This page provides the compliance documentation required to maintain PCI PTS approval for the oDynamo hybrid insertion secure card reader authenticator (SCRA), including the device and package inspection guides for tamper detection and physical security verification.
Reference Section
Information Available
A step‑by‑step service and repair manual that explains how to visually inspect the oDynamo’s enclosure, bezel, screws, ventilation holes, dismount switches, and connection ports for signs of tampering or unauthorized modification to help ensure the device remains PCI PTS 5.x SRED compliant before deployment.
The Package Inspection Document provides step-by-step visual and physical verification procedures for detecting tamper evidence on oDynamo packaging—including security tape inspection, seal integrity checks, and serial number validation—to ensure the single‑pack and multi‑pack devices remain PCI compliant before installation.
Need Help?
For additional support, please contact MagTek Support:
Technical Support:
📧 Email: support@magtek.com
📞 Phone: 1-562-546-6800 (US)
🕐 Hours: Monday-Friday, 5:30 AM - 5:00 PM PST
Online Resources:
🌐 Support Portal: developer.magtek.com
Documentation Feedback:
Help us improve this documentation!
oDynamo is a PCI PTS 5.x, SRED Certified hybrid insertion reader. oDynamo’s enclosure and its associated electronics have been designed to form a Tamper Resistant Security Module (TRSM). The covers are securely attached and incorporate sensing circuits to detect if any attempt is made to open the device. Internal spaces within the device have been minimized to reduce the possibility
of unauthorized modifications. Any attempt to penetrate or modify oDynamo electronically will cause the device to permanently erase its stored encryption keys, after which oDynamo will cease to function. Inspect the following areas of the device for tampering.
Carefully inspect the form factor. Make certain there are no additional electronics, wires or forms added to the device. Check the overall form factor for signs of attempted entry.
Look for any hidden and additional wires in crevasses, seams, and exterior surface. Check there are no additional wires on the device.
The device’s installation face includes a gasket. Do not remove the gasket.
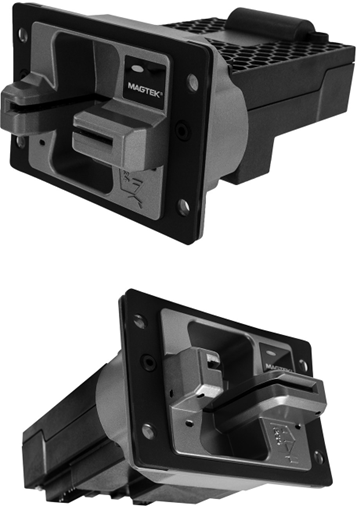
The front face metal bezel is one die-cast piece. Inspect for any modification or hidden wires protruding from the card slot or drain holes.
The device includes a label well around the General Status LED. MagTek is default label.
Apply power to the device, LED should be solid GREEN. Apply power to the device for 60 seconds. If the LED shows any red, a tamper event has occurred.
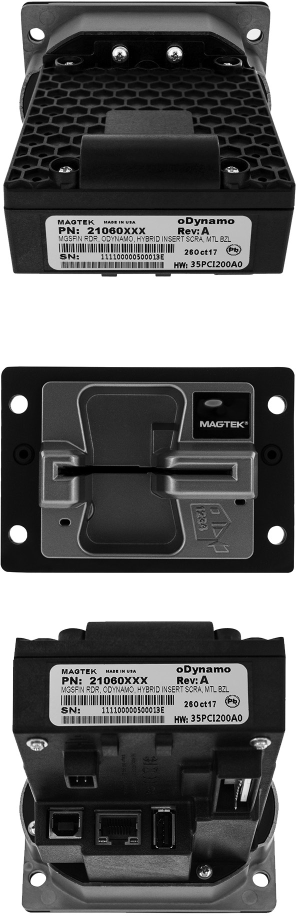
The product label is located on the back of the device. Check PN, SN and HW number. Serial Number matches serial number on boot-up.
Look for any hidden and additional wires in crevasses, seams and exterior surface of the device.
Check tampering of 6 screws. DO NOT REMOVE THE SCREWS.
PRIOR TO INSTALLATION Inspect for objects or wires in the vent holes.
The card insertion slot is a smooth, unobstructed path. Insert an embossed card into the device to check for any signs of obstruction inside. Other than the magnetic head that reads magnetic stripes and contact points that read chips there are no electronics, objects, or wires on the path.
Unauthorized removal of switches will disable the device. Exercise the two (2) dismount switches by pressing them. They should return to the original position upon release of finger pressure.
Inspect individual connection ports
RS-232 and Power Port
USB Host Port
USB Device Port
Ethernet Port
Check tampering of 4 screws. DO NOT REMOVE THE SCREWS.
PRIOR TO INSTALLATION Inspect for objects or wires in the vent holes.
The card insertion slot is a smooth, unobstructed path. Insert an embossed card into the device to check for any signs of obstruction inside. Other than the magnetic head that reads magnetic stripes and contact points that read chips there are no electronics, objects, or wires on the path.
Unauthorized removal of switches will disable the device. Exercise the two (2) dismount switches by pressing them. They should return to the original position upon release of finger pressure.
Inspect where the seams come together to ensure there are no extraneous wires.
Inspect crevasses to ensure there are no extraneous wires.
Inspect the 4x drain holes below the bezel nose (plus the 1x drain hole to the left side of the bezel nose). There are no electronics, objects or wires coming from the drain holes.
Inspect where the seams come together to make ensure are no extraneous wires.
Inspect crevasses to make certain there are no extraneous wires.
Carefully inspect the form factor. Ensure there are no additional electronics, wires, or forms added to the device.
Periodically inspect the following items:
Metal Bezel
Card Slot
When servicing behind cabinet/door (terminal) inspect device for external wires, or foreign objects not included in the solution design. For proper installation, refer to your solution design documentation.
Observe front face of the metal bezel and inspect for any modification or hidden wires.
Look for any hidden and additional wires. No additional wires should be coming out of the holes.
Check all views of the device and compare to photos.
It is helpful to do the following for your device inspection audit.
Have a list of the device sand details listed on the asset tag.
Take photos of the front, back, and sides of each device.
Check device Part numbers, serial numbers and IDs and check physical connections. Report any suspected signs of tampering immediately.
How to find oDynamo on PCI web site https://www.pcisecuritystandards.org/assessors_and_solutions/pin_ transaction_devices.
Search for MagTek and find the product name, oDynamo, on the web page. Compare the Hardware # and Firmware #.
Periodically inspect the following items while installed: Exterior surface/metal bezel
Card slot
Five (5) drain holes
Form factor
Crevasses
Inspect the following additional items during service:
Crevasses
Screws
Ventilation holes
Connection ports
Alternative Earth Grounding Port
Screws
Seams parting lines
ODynamo SCRA reads magnetic stripe cards and EMV chip cards and is PCI compliant. The packaging has been designed to be tamper resistant and tamper evident. The packaging closure uses security tape. Any attempt to open the package would show signs of tampering. This document reviews how to detect tamper evidence in a single and multi-pack package.
Package inspection upon receipt
If yes, then tampering has occurred
If no, then continue inspection
Cardboard box - Top, Bottom, Sides
Check the overall form factor for signs of attempted entry.
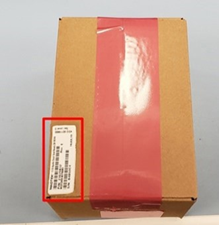
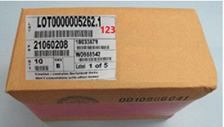
SN label and security tape are applied to top of package.
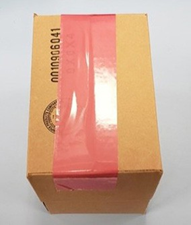
Security tape is applied to bottom of package.
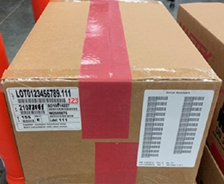
Packing Lot Label is applied to side of package.
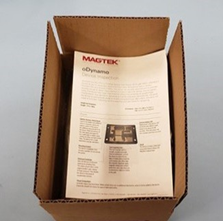
Inside of package holds device inspection document.
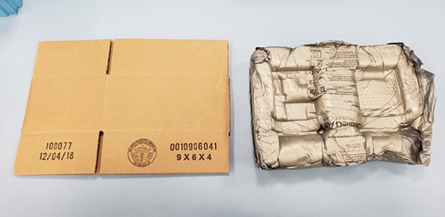
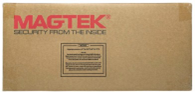
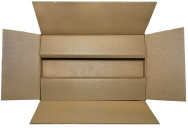
Security tape secures the package together. The package itself is a brown box as pictured below with fitted foam.
Check the overall form factor for signs of attempted entry.
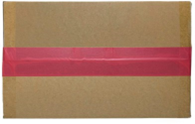
Security tape goes across center package seam. Clear packaging tape is across package ends seams.
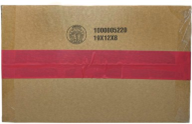
Security tape is applied across the bottom package seam.
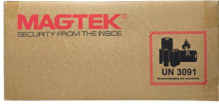
Package front has a MagTek logo and UN 3091 battery warning emblem.
Package back has MagTek logo and storage notice.
Security tape is applied across the top and bottom of the package, to not overlap at the sides.
Security tape is applied across the top and bottom of the package, to not overlap at the sides.
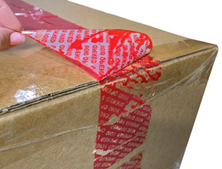
Security tape is red and applied across center seam of package.
When tape is peeled back, “OPENED” warning pulls from tape and adheres to package. There is clear evidence of attempts to remove tape. Check seams have not been cut and re-taped.
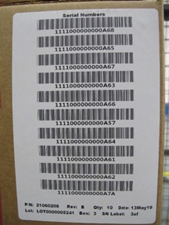
This lists the serial numbers of the devices packed in the shipment.
On one side, the serial number list label and LOT label is applied.
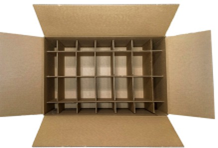
Inside the package is a pad to secure the devices, pictured below.
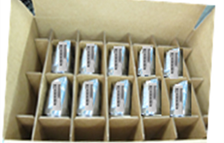
After removing the pad, there are partitions that separate the devices from one another.
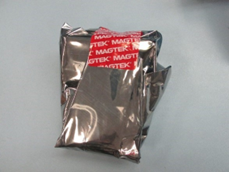
Devices additionally have MAGTEK security tape holding the static shield bag in place.
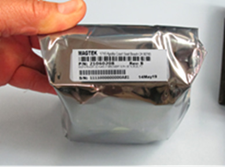
On the end of the static shield bag is the device serial number. Compare this with the serial list label on the outside of the package.
A view of the partition with no devices. The partitions are designed to hold a maximum of 10 devices.
To check for PCI Validation check the Hardware and Firmware ID. Hardware ID is printed on the label. The Firmware ID is accessible via the device and displayed on the screen. Go to the PCI compliance web page, compare the Hardware ID and Firmware ID: .
Are there any breaks in the sealed plastic enclosure?
Tripped device
If there is forced entry, the security switches built into the electronics will be tripped. If they are tripped the sensitive data such as encryption keys and certificates are cleared as part of security measures mandated by PCI, and the oDynamo will be non-responsive with a blank display. Is the device non-responsive?
Does the box appear to be torn or cut?
Is there any damage to the box?
Are there any changes to the printing or labeling?
Inside the package
Are the components placed in the box as pictured in this document?
Security Tape
Is the tape missing? Devices are always shipped with security tape. Tape is red. The tape should only be located as pictured.
Do you see the words "OPENED" or "VOID" where the tape is supposed to be?
After removal of the security tape, it will leave red ink glued to the box: inverse OPENED and VOID text.
Has the tape been cut? Has it been replaced? Check to make certain the tape has not been cut and that new clear tape has not been placed over the existing security tape.
Is there any evidence of red ink? Does the front edge show any residual red ink, or scratch marks from an attempt to remove the residual security tape ink.
Installation site inspection
If yes, then tampering has occurred
If no, then continue inspection
Sealed plastic enclosure
Does the device appear to have any physical forced entry points?
If the security switches have been tripped, the oDynamo cannot be repaired in the field. It must go back to the factory for repair. Follow RMA procedures. Report all signs of tampering as per standard protocol.